

SAFETY FIRST!First Rule for any garage door repair: UNPLUG THE DOOR OPENERThe door must be in manual operation. Do this by Pulling the release.Next, Using vice grips, clamp the door in place, either up or down depending on the task. Be sure to clamp each side of the door.Never neglect these basic rules when working on any garage door. Accidental operation of the door while it is under repair can be fatal. |
Tools Required:
Hack Saw
Utility Knife with a sharp blade
T or try Square
Pencil
Hammer
Calk and Calk gun
How to install garage door weather stripping
With the garage door unplugged and clamped in the open position, measure the width of the opening at the top where the door seal will be nailed.
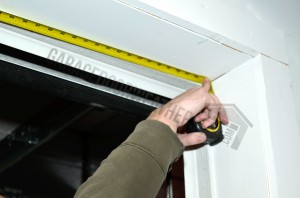
Cutting the top piece of the seal is the challenge of this easy to do project.
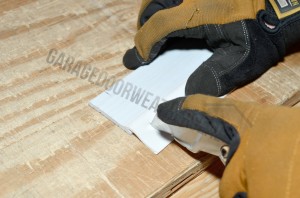
Having someone else will greatly help. One tip is to temporarily nail one end of the seal in place and add a few temporary nails to keep the seal up when you mark it for cutting. This step is a bit cumbersome so be sure to take your time and cut where it will be a nice tight fit.
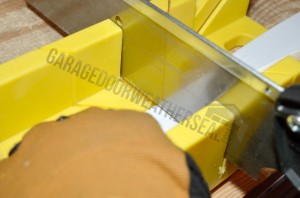
Square cut the PVC, do not miter and use the utility knife to cut the vinyl flap the same length as the PVC portion of the weather seal.
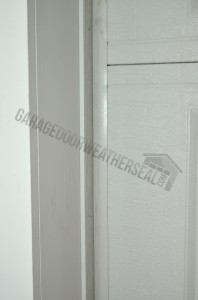
Next you’ll use some temporary nails to nail the top seal to the jamb with the inside edge of the PVC portion to be even with the inside edge of the jam.
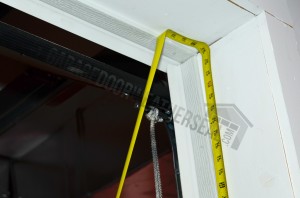
Now measure and cut the side pieces. Use temporary nails again to nail the side pieces so that the edge of the PVC is flush with the inside of the door jamb just as you did with the top.
Remove clamps, have door in closed position and re clamp the door tightly to the floor.
Now it’s time to set the weather seal in place.
No part of the PVC portion should touch the garage door, only the vinyl is to contact the door. You want the vinyl to form a “J” shape to the door – Not a 90 degree angle. Apply some temporary nails both top and sides.
Then remove clamps and open and close the door a few times by hand to be sure that the weather seal is not impeding the garage door in any way.
Once this has been confirmed, close and clamp the door down and set the nails.
Typically 6” to 8” spacing between nails is sufficient. If you are within 4″ of the end of the PVC be sure to pre drill – Do Not Nail.
It is recommended that you pre drill everything when installing in very cold temperatures to avoid cracking the PVC portion.
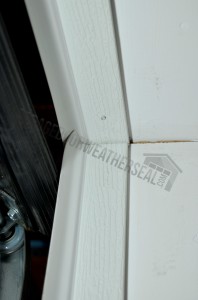
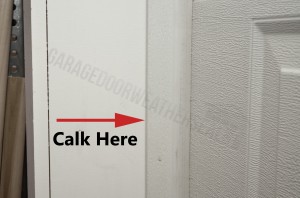
Now using a good quality colored calk, calk at the leading edge of the PVC where it meets the jamb.
This will prevent air from getting in under and behind the weather seal. We also run a bead of calk at the point where the top meets the sides and also on the bottom of the sides at the floor.


Comments are closed.